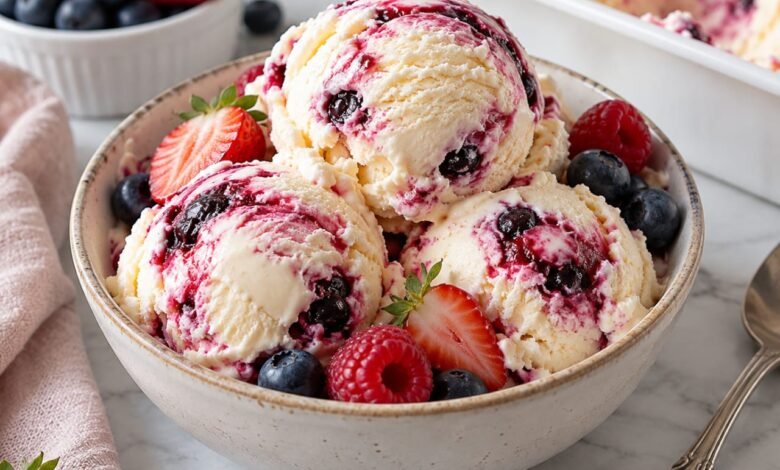
This easy condensed milk ice cream is rich, smooth, and wonderfully creamy, with a delicate vanilla flavor. Inspired by the simplicity of classic British homemade desserts, this no-churn recipe requires just three basic ingredients and no ice cream machine.
Sweetened condensed milk provides sweetness and helps create a smooth texture, while whipped heavy cream adds air and richness. A little vanilla brings everything together. Simply mix, freeze, and enjoy homemade ice cream whenever you want a refreshing dessert.
Whether you serve it in a bowl, alongside a slice of cake, or topped with fresh berries, this simple vanilla ice cream is easy to customize with your favorite flavors.
Why You’ll Love This Condensed Milk Ice Cream
- No ice cream machine needed: A mixer and a freezer-safe container are enough.
- Only three main ingredients: Heavy cream, sweetened condensed milk, and vanilla extract.
- Easy to customize: Add chocolate chips, berries, caramel, or crushed cookies.
- Make-ahead friendly: Prepare it in advance and freeze until serving time.
- Beginner-friendly: The method is straightforward and requires no cooking.
Ingredients You’ll Need
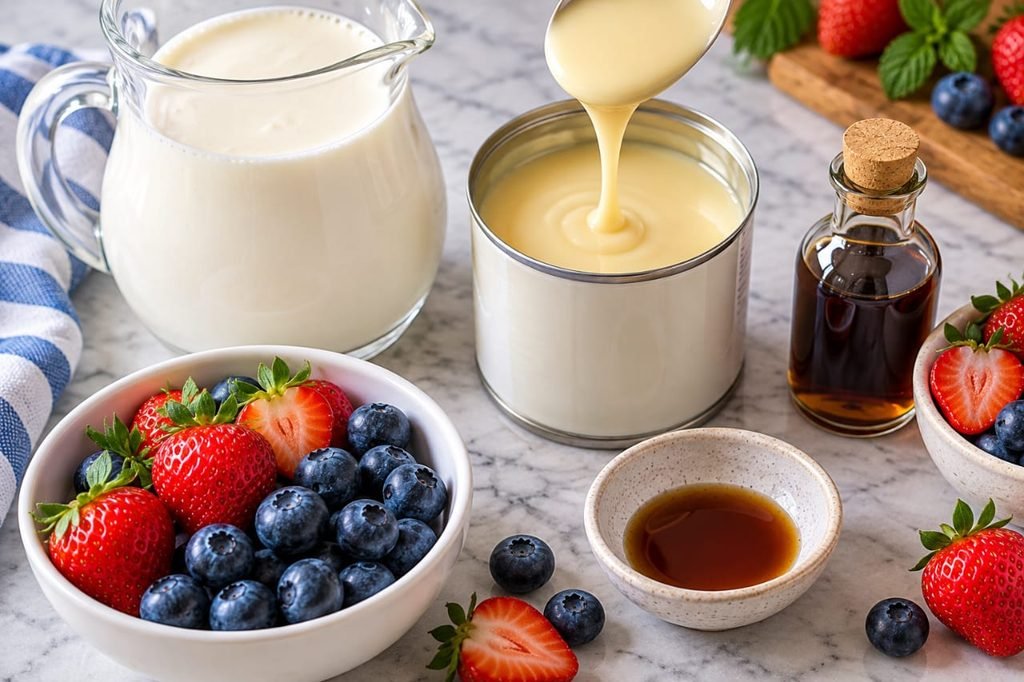
- 2 1/2 cups (600 ml) heavy whipping cream: Use cold cream with approximately 35% fat or more for a rich texture and good whipping results.
- 1 can (14 oz / 397 g) sweetened condensed milk: Use sweetened condensed milk, not evaporated milk. It provides sweetness and helps keep the ice cream creamy.
- 2 teaspoons vanilla extract: Adds a classic vanilla aroma. Use pure vanilla extract if available.
Because sweetened condensed milk already contains sugar, this recipe does not need additional granulated sugar.
Equipment
- Large mixing bowl
- Electric hand mixer or stand mixer
- Rubber spatula
- Freezer-safe loaf pan or airtight container
- Ice cream scoop
How to Make Condensed Milk Ice Cream
Step 1: Chill the Bowl and Cream
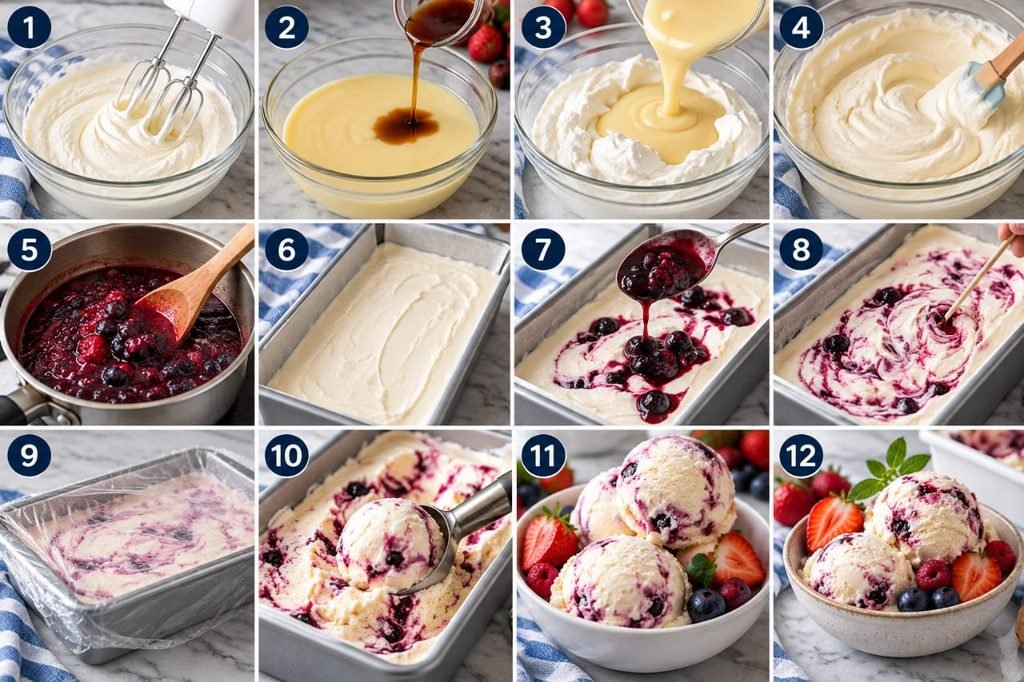
Make sure the heavy cream is cold before you begin. For easier whipping, place the mixing bowl and beaters in the refrigerator for about 10–15 minutes.
Cold cream whips more efficiently and helps the finished mixture retain its airy texture.
Step 2: Whip the Heavy Cream
Pour the cold heavy cream into the mixing bowl. Beat with an electric mixer until medium peaks form. When you lift the beaters, the cream should hold its shape but still look smooth and creamy.
Avoid overwhipping. If the cream becomes grainy or begins to separate, the texture of the finished ice cream may suffer.
Step 3: Add the Condensed Milk
Pour the sweetened condensed milk into a separate bowl and stir in the vanilla extract.
Add about one-third of the whipped cream to the condensed milk and gently mix to lighten it. Then fold in the remaining whipped cream in two additions using a rubber spatula.
Use gentle movements from the bottom of the bowl toward the top. Stop when the mixture is evenly combined, keeping as much air in the cream as possible.
Step 4: Transfer to a Container
Spoon the ice cream mixture into a freezer-safe loaf pan or airtight container. Smooth the surface with a spatula.
Press a piece of baking paper or freezer-safe wrap directly against the surface if your container does not have a tight-fitting lid. This helps limit contact with air and can reduce ice crystals.
Step 5: Freeze Until Firm
Cover the container and freeze for at least 6 hours, preferably overnight. The exact time depends on the depth of the container and the temperature of your freezer.
The ice cream should be firm enough to scoop before serving. If it is still soft, return it to the freezer for longer.
Step 6: Scoop and Serve
Remove the ice cream from the freezer and let it stand at room temperature for about 5–10 minutes to soften slightly.
Scoop into chilled bowls or cones. Serve plain or add fresh berries, chocolate shavings, caramel sauce, or your favorite dessert topping.
Tips for Smooth and Creamy No-Churn Ice Cream
- Choose high-fat cream: Heavy cream with at least 35% fat generally gives the best volume and texture.
- Start with cold cream: Warm cream is harder to whip properly.
- Stop whipping at the right time: Medium peaks are a good target before folding in the condensed milk.
- Fold gently: Vigorous stirring removes air and can make the ice cream denser.
- Use sweetened condensed milk: Evaporated milk is not a direct substitute because it has a different sugar content and consistency.
- Protect the surface: Keep the container tightly covered to reduce freezer burn and ice crystals.
- Allow a few minutes before scooping: Brief softening makes serving easier.
Flavor Variations
Chocolate Chip Ice Cream
Gently fold in about 1/2 cup of mini chocolate chips just before transferring the mixture to the container.
Strawberry Ice Cream
Fold in a small amount of thick, cooled strawberry puree. Avoid adding too much liquid, which can make the texture icy. Freeze until firm.
Blueberry Swirl Ice Cream
Swirl a few spoonfuls of thick blueberry sauce through the mixture using a knife or skewer. Do not mix completely, so the finished ice cream keeps visible ribbons of fruit.
Chocolate Ice Cream
Fold in 2–3 tablespoons of sifted unsweetened cocoa powder, mixed first with a little condensed milk to make a smooth paste. Taste before freezing and adjust the flavor if needed.
Caramel Ice Cream
Drizzle a few tablespoons of thick caramel sauce over the mixture and gently swirl it through before freezing.
What Is the Difference Between Condensed Milk and Evaporated Milk?
Sweetened condensed milk is milk that has had much of its water removed and contains added sugar. It is thick, sweet, and useful in no-churn ice cream because it contributes both sweetness and body.
Evaporated milk is concentrated milk without the same amount of added sugar. It is thinner and is not a direct replacement for sweetened condensed milk in this recipe.
Why Is My Homemade Ice Cream Icy?
Ice crystals can develop when the mixture contains too much free water, when fruit additions are watery, or when the ice cream is exposed to air during storage. A low-fat cream may also produce a less creamy result.
Use full-fat cream, fold the mixture gently, avoid adding large amounts of watery fruit, and keep the container tightly covered in the freezer.
Why Didn’t My Ice Cream Freeze Firmly?
The ice cream may need more time in the freezer, particularly if it is stored in a deep container or the freezer is frequently opened. Make sure the container is freezer-safe and the mixture has had at least 6 hours to set, preferably overnight.
How to Store Condensed Milk Ice Cream
Keep the ice cream in an airtight, freezer-safe container. For the best texture, enjoy it within 2–4 weeks. It may remain safe for longer if continuously frozen, but quality can gradually decline.
Keep the container covered between servings and return it to the freezer promptly. Avoid repeatedly melting and refreezing the ice cream, as this encourages ice crystals to form.
Frequently Asked Questions
Can I make condensed milk ice cream without an ice cream machine?
Yes. This is a no-churn recipe. Whip the cream, fold it into the sweetened condensed milk, and freeze the mixture until firm.
How long does no-churn ice cream take to freeze?
Allow at least 6 hours, although overnight freezing usually produces a firmer result. Containers that are deeper or larger may take longer.
Can I use whipping cream instead of heavy cream?
Yes, provided the cream has enough fat to whip properly. A cream with approximately 35% fat or more is recommended for the best structure.
Can I reduce the sweetness?
Sweetened condensed milk is a major part of the recipe’s structure, so reducing it substantially may affect the result. You can balance the sweetness with unsweetened cocoa, a small amount of espresso, or a tart fruit swirl rather than simply removing a large quantity of condensed milk.
Can I add fruit to the ice cream?
Yes. Use small amounts of thick fruit puree, cooked fruit sauce, or finely chopped fruit. Cool cooked additions completely and avoid adding too much liquid, which can make the ice cream icy.
Is this recipe vegan?
No. This version contains dairy cream and milk-based condensed milk. A vegan version requires suitable plant-based whipping cream and a vegan condensed milk alternative, and the quantities may need to be adjusted.
Final Thoughts
This condensed milk ice cream is a simple way to make a creamy frozen dessert at home without an ice cream machine. With just three main ingredients, it provides a smooth vanilla base that you can enjoy on its own or customize with fruit, chocolate, or caramel.
For the best results, use cold full-fat cream, fold gently, and allow enough time for the mixture to freeze. Keep it covered in the freezer and soften it briefly before scooping.